How to Test an Alternator
Testing to see if your alternator is any good
The alternator is a crucial component of your vehicle's electrical system, responsible for generating electricity to recharge the battery and power various electrical systems while the engine is running. If your alternator fails, it can lead to a dead battery and a host of electrical problems. Therefore, knowing how to test an alternator is an essential skill for any car owner or DIY enthusiast. In this comprehensive guide, we will walk you through various methods to test an alternator, ensuring you can diagnose and address issues promptly.
Why Test Your Alternator?
Before we dive into the testing methods, let's briefly discuss why it's essential to test your alternator regularly. A properly functioning alternator performs the following vital functions:
-
Battery Charging: The alternator ensures that the battery remains charged, providing the necessary power to start your vehicle and operate various electrical components.
-
Power Supply: It supplies electricity to the car's electrical systems, including lights, air conditioning, and entertainment systems.
-
Voltage Regulation: The alternator regulates the voltage to prevent overcharging the battery, which can damage it, or undercharging, which can leave you stranded with a dead battery.
-
Electrical System Stability: A failing alternator can cause electrical system issues, such as dimming headlights, erratic dashboard lights, and intermittent electrical failures.
Now that you understand the importance of testing your alternator, let's explore the methods you can use to diagnose potential problems.
Method 1: Visual Inspection
The first step in testing an alternator is a visual inspection. Here's what you should look for:
-
Drive Belt: Check the condition and tension of the drive belt connected to the alternator. A loose or damaged belt can lead to insufficient charging.
-
Wiring: Inspect the wiring connected to the alternator for any signs of wear, damage, or loose connections. Ensure all connections are secure.
-
Corrosion: Look for signs of corrosion or rust on the alternator's terminals and connectors. Clean them if necessary.
-
Physical Damage: Examine the alternator for physical damage, such as cracks or dents, which can affect its performance.
Method 2: Multimeter Test
A multimeter is a versatile tool that can help you perform several tests on your alternator. Here's how to use it:
Tools Required:
- Multimeter
- Safety goggles
- Gloves
Procedure:
-
Safety Precautions: Before starting, ensure your vehicle is parked in a safe, well-ventilated area, and the engine is turned off.
-
Safety Gear: Put on safety goggles and gloves to protect yourself.
-
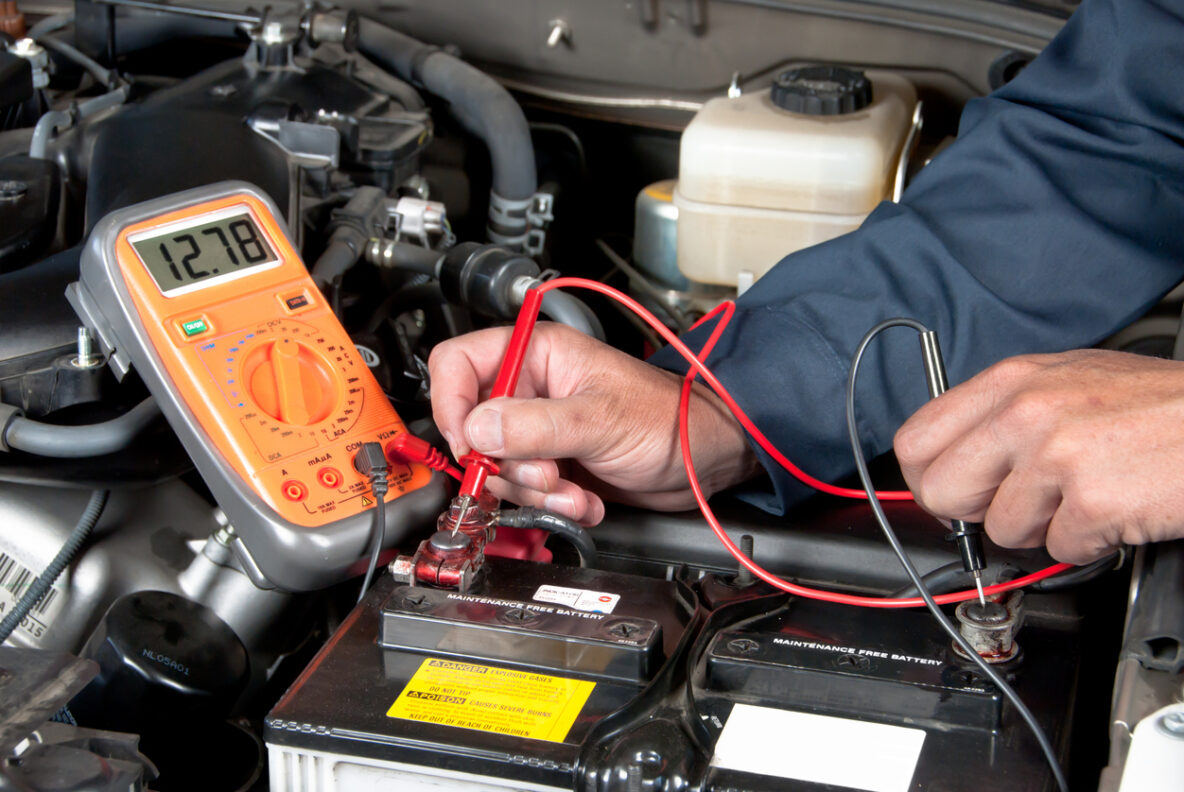
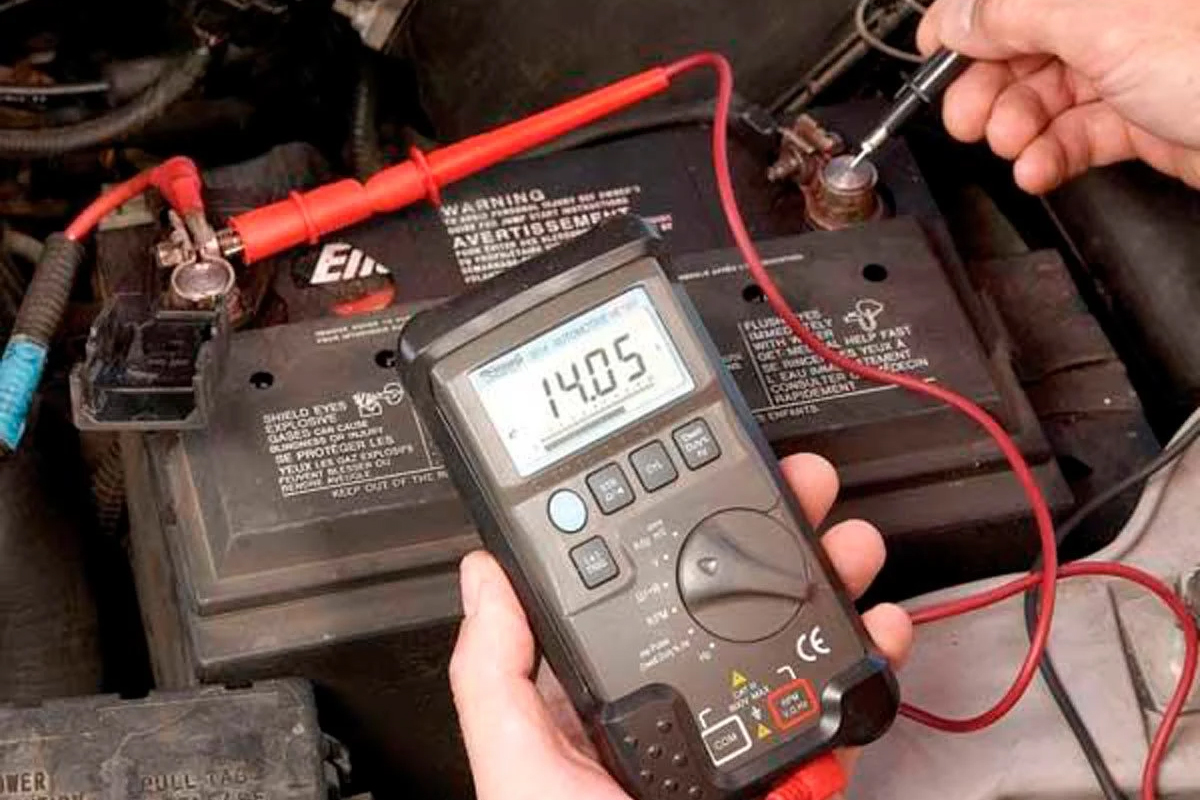
Voltage Test:
- Set your multimeter to DC voltage mode (usually represented as "V" with a straight line or dashes above it).
- Connect the multimeter's red lead to the positive terminal of the battery.
- Connect the multimeter's black lead to the negative terminal of the battery.
- Note the voltage reading. A fully charged battery should read around 12.6 volts.
- Start the engine and rev it to about 1500 RPM. The voltage reading should increase to around 13.8 to 14.4 volts if the alternator is functioning correctly.
-
Diode Test:
- Set your multimeter to the diode testing mode (usually represented by a diode symbol).
- Connect the multimeter's leads to the alternator's diode terminals (refer to your vehicle's repair manual for the exact location).
- The multimeter should display a reading of around 0.6 to 0.7 volts in one direction and "OL" (overload) in the reverse direction. If you get different readings, it may indicate a faulty diode.
-
Resistance Test:
- Set your multimeter to the resistance (ohms) mode.
- Disconnect the battery terminals from the alternator.
- Measure the resistance between the alternator's positive and negative terminals. Typically, the resistance should be low (near 0 ohms). High resistance indicates a problem.
Method 3: Alternator Noise Test
A noise test can help you identify issues with the alternator's bearings or pulleys. Here's how to conduct this test:
Tools Required:
- Stethoscope or long screwdriver
Procedure:
-
Start the engine and let it idle.
-
Position the stethoscope or the tip of a long screwdriver on the alternator casing or housing.
-
Listen carefully for any unusual noises coming from the alternator, such as grinding, squealing, or rattling. These noises may indicate bearing or pulley problems.
Method 4: Load Test
A load test assesses the alternator's ability to handle the electrical demands of your vehicle. Here's how to perform a load test:
Tools Required:
- Multimeter
- High-wattage resistor (around 100-200 ohms, 100 watts)
- Safety goggles
- Gloves
Procedure:
-
Safety Precautions: As with other tests, ensure safety first. Park your vehicle in a safe location and turn off the engine.
-
Safety Gear: Wear safety goggles and gloves.
-
Voltage Test: Start your engine and perform a voltage test using the multimeter as described in Method 2. Note the voltage output.
-
Load Test Setup:
- Connect the high-wattage resistor across the battery terminals while the engine is running. This simulates a high electrical load on the alternator.
- Monitor the voltage with the multimeter while the load is applied. The voltage should remain within the acceptable range (around 13.8 to 14.4 volts). A significant drop in voltage may indicate an alternator problem.
Testing your alternator is a vital part of regular vehicle maintenance. By following the methods outlined in this comprehensive guide, you can diagnose potential alternator issues early, preventing costly breakdowns and ensuring your vehicle's electrical system functions optimally. Remember that if you're unsure about performing these tests yourself, it's always a good idea to consult a professional mechanic for a thorough alternator inspection and repair if necessary. Regular alternator maintenance will keep your vehicle running smoothly and help you avoid unexpected breakdowns on the road.